When I first tackled lighting my backyard, I made every mistake. I bought the cheapest solar path lights I could find, shoved them randomly along the walkway, and called it a day.
Six months later, half had stopped working, the coverage was uneven, and the yard looked more like an airport runway than a relaxing outdoor retreat.
That experience taught me something important: outdoor garden lighting isn’t just about buying a few fixtures and plugging them in. It requires a plan, the right equipment, and an understanding of how light interacts with different garden elements.
This article is for people who are just starting and want to put up yard lighting that works, looks good, and saves energy, without making the same costly mistakes I did at first.
Why Garden Lighting Matters More Than You Think?
Outdoor lighting serves three core purposes:
- Safety: illuminating walkways, steps, and entrances to prevent trips and falls.
- Security: deterring intruders with motion-activated or perimeter lighting.
- Ambiance: creating a visually appealing outdoor space for evening relaxation or entertaining.
According to the American Lighting Association, well-designed outdoor lighting can increase a home’s curb appeal by up to 20%. Beyond aesthetics, the U.S. Department of Energy recommends LED outdoor fixtures as a primary choice due to their 75% greater energy efficiency compared to incandescent bulbs.
Step 1: Plan Your Lighting Layout Before You Buy Anything
This is the step most beginners skip, and it’s the most important one.
Walk Your Garden at Night
Go outside after dark with a flashlight. Identify:
- Areas that feel unsafe or hard to navigate.
- Spots you want to highlight (a tree, a water feature, a garden bed).
- Entry and exit points that need clear visibility.
Sketch a rough map of your garden and mark these zones. This doesn’t need to be precise — even a napkin sketch will help you buy the right quantity and type of fixtures.
Divide Your Garden Into Lighting Zones
Professional landscape designers typically use three zones:
- Task zones: paths, stairs, driveways (need bright, directional light).
- Accent zones: trees, sculptures, flower beds (need focused, subtle uplighting).
- Ambient zones: seating areas, patios, pergolas (need soft, diffused light).
Step 2: Understand Your Lighting Options
Solar vs. Low-Voltage vs. Mains-Powered
| Feature | Solar Lights | Low-Voltage (12V) | Mains-Powered (120V) |
|---|---|---|---|
| Installation Cost | Very Low | Moderate | High |
| Running Cost | Free | Very Low | Low–Moderate |
| Brightness | Low–Moderate | Moderate–High | High |
| Reliability | Weather-dependent | High | Very High |
| DIY Friendly | ✅ Very Easy | ✅ Moderate | ⚠️ Requires an electrician |
| Best For | Path markers, accents | Full garden setups | Permanent fixtures |
My recommendation for beginners: Start with a low-voltage LED transformer system. It gives you significantly more brightness and reliability than solar, without the safety risks or permit requirements of mains wiring.
Bulb Types to Know
- LED: Best overall choice. Long lifespan (25,000+ hours), energy efficient, available in warm or cool tones
- Halogen: Brighter but runs hot and uses more energy; being phased out in many countries
- Solar LED: Convenient but limited by cloud cover and seasonal daylight hours
For outdoor use, always look for IP65 or higher-rated fixtures (IP = Ingress Protection). This means the fixture is fully dust-tight and protected against water jets.
Step 3: Choose the Right Fixtures for Each Zone
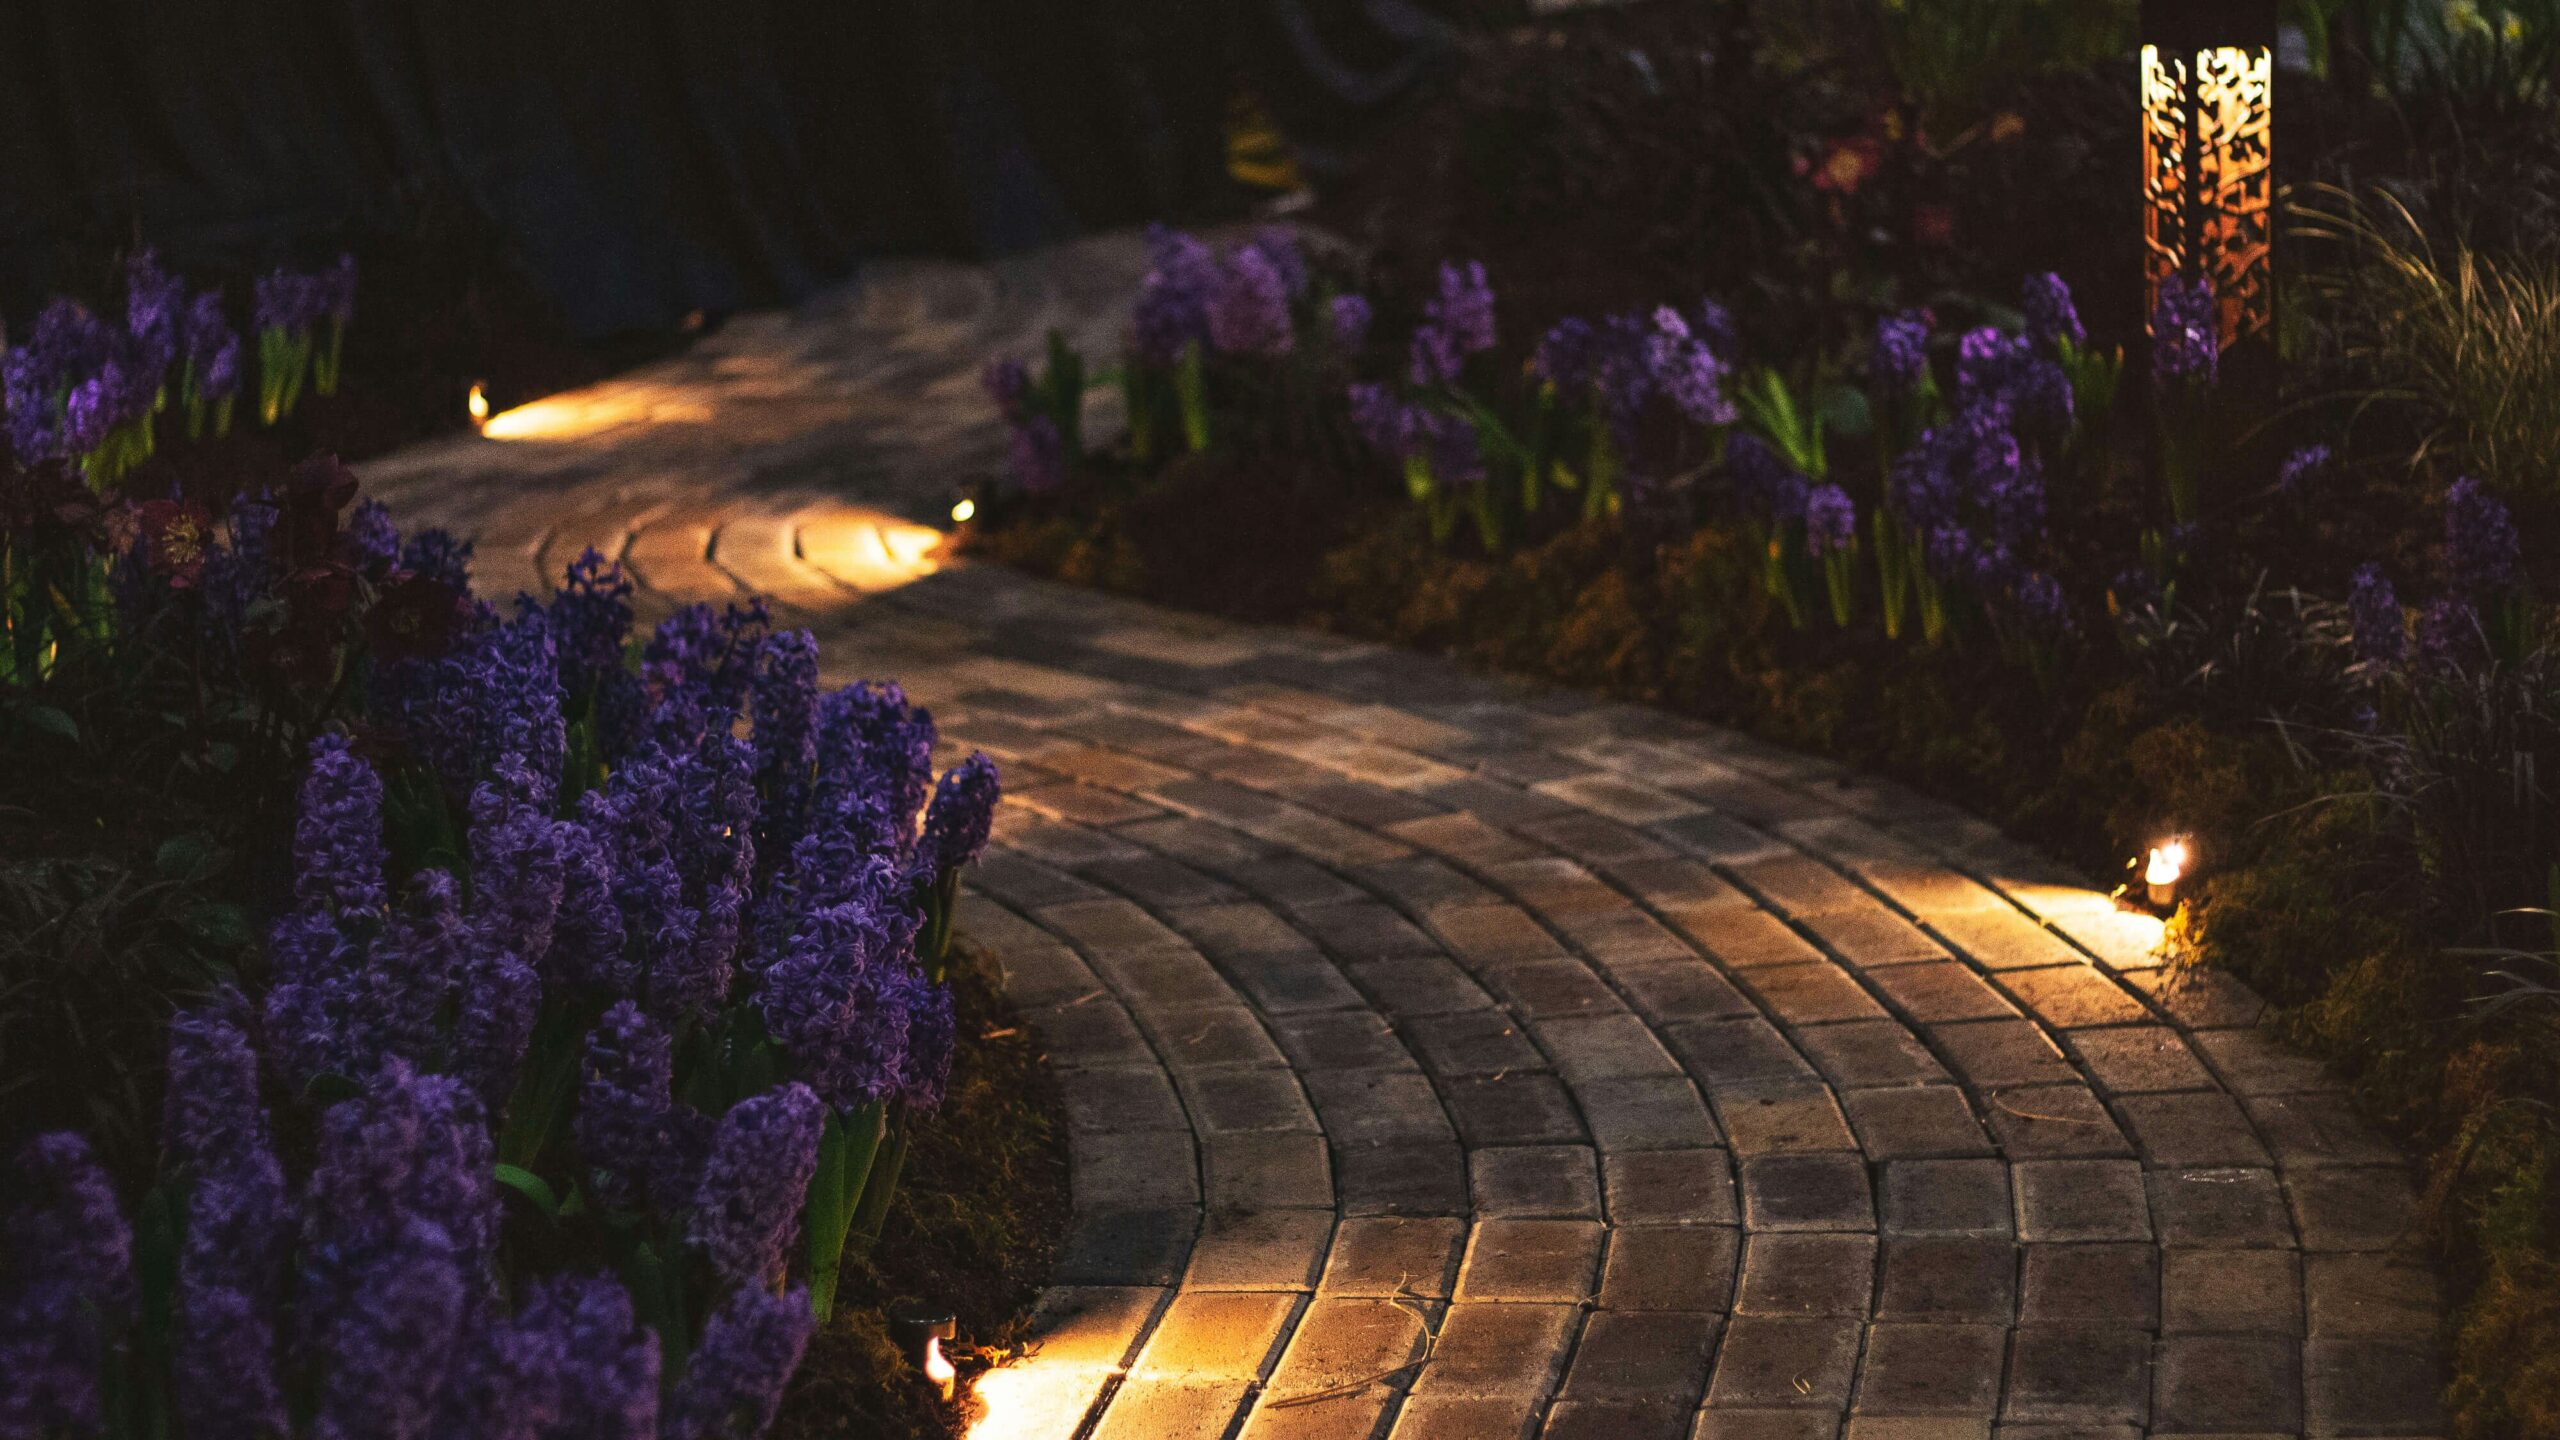
Path Lights
Low, mushroom-style fixtures that cast light downward along walkways. Space them 6–8 feet apart on alternating sides for even coverage without a “runway” effect. Look for fixtures with a warm color temperature of 2700K–3000K for a welcoming feel.
Spotlights and Uplights
Used to highlight architectural features or plants. Uplighting a tree from below creates dramatic shadow effects. For specimen trees, use a 6–12 watt LED spotlight positioned at a 45-degree angle from the trunk.
Step and Deck Lights
These mount flush into risers or deck boards. They’re essential for safety and surprisingly impactful aesthetically. Many come in brass or stainless steel finishes that age well outdoors.
String Lights and Lanterns
Perfect for patios and pergolas. Use outdoor-rated string lights with S14 or G40 bulb styles for a warm, festive look. Always verify the lights are rated for outdoor use — indoor string lights degrade quickly in moisture.
Real-World Examples: What Actually Works?
Example 1: The Small Urban Backyard (London, UK)
A homeowner with a 15 x 20 ft city garden used a 12V transformer with 8 path lights and 2 uplights to transform a flat, dark space. Total cost: approximately £180. Result: the garden became usable in the evenings, and the uplighting on a mature olive tree became the visual centerpiece.
Key lesson: fewer, higher-quality fixtures outperform a lot of cheap ones.
Example 2: The Suburban Front Yard (Texas, USA)
A family in Houston used solar path lights for two years before switching to a low-voltage system after repeated failures during cloudy winters. After switching, they installed 10 path lights, 4 uplights on oak trees, and 2 wall-mounted fixtures near the garage. Energy cost: approximately $3/month. The switch improved both reliability and brightness significantly.
Key lesson: Solar is a starting point, not a long-term solution for most climates.
Example 3: The Rural Cottage Garden (Ontario, Canada)
With no mains power near the garden area, this homeowner used a combination of solar-powered spotlights with built-in dusk-to-dawn sensors and rechargeable battery-powered lanterns. They prioritized placement carefully — lights near south-facing walls got maximum sun exposure.
Key lesson: When solar is your only option, placement of the solar panel matters as much as the light itself.
Step 4: Install Your System Correctly
For Low-Voltage Systems
- Install the transformer near an outdoor GFCI outlet — this is a non-negotiable safety requirement
- Run the cable along the garden edge, buried 3–6 inches deep or secured with landscape staples
- Connect fixtures using the snap-on connectors included with most low-voltage kits
- Set the timer on the transformer — dusk-to-11 pm is a popular setting that balances ambiance with energy saving
Common Beginner Mistakes to Avoid
- Over-lighting: More lights don’t mean better lighting. Aim for contrast and depth, not uniform brightness
- Ignoring neighbors: Point fixtures downward or inward to avoid light trespass
- Skipping weatherproofing: Always use outdoor-rated wire connectors and seal junction points
- Mismatching color temperatures: Mixing 2700K and 5000K fixtures in the same space looks inconsistent and jarring
Beginner’s Shopping Checklist
Before you buy, make sure you have:
- A garden layout sketch with marked zones.
- A transformer rated 20–40% above your total fixture wattage.
- IP65+ rated fixtures for all outdoor use.
- Outdoor-rated low-voltage cable (typically 12 or 16 gauge).
- A GFCI-protected outdoor outlet.
- LED bulbs in consistent color temperature (2700K–3000K recommended).
Conclusion
Garden lighting is one of those projects where you genuinely learn by doing. My advice: start with a modest system covering your path and one accent feature, live with it for a season, and expand from there.
You’ll develop an eye for what works in your specific space — and you’ll avoid the trap of over-investing in a layout you’ll later want to change.